When should you use neon.ly?
Sometimes links are just hard to remember, don’t really look secure, and, depending on where they lead to, are not easy to track.
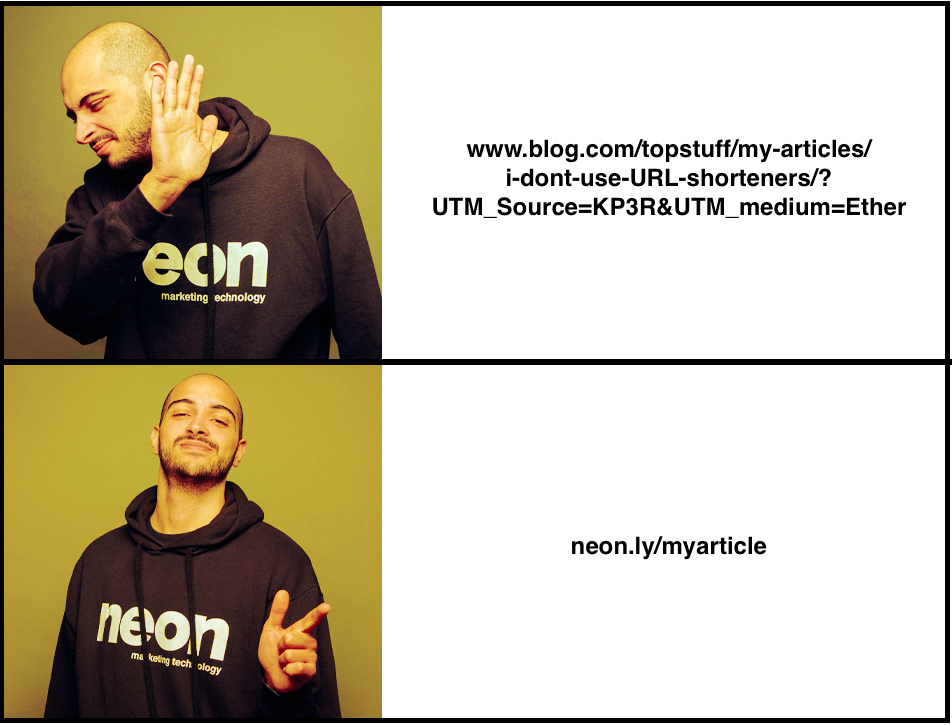
That’s where neon.ly comes in – shrink your existing links into short links that are:
- 🧠 easy to remember by your followers
- 🐦 nicely fit into a Tweet or Instagram Bio
- 📈 track click data (for example when your link does not go to a page on which you can track visits, like your IG profile)
- ✨ clean and concise, no distraction that could disturb your follower
- 🔐 password protectable if needed
Read our blog article “Why you should use URL Shorteners” to learn more about the benefits.
How to use neon.ly
Creating a short link
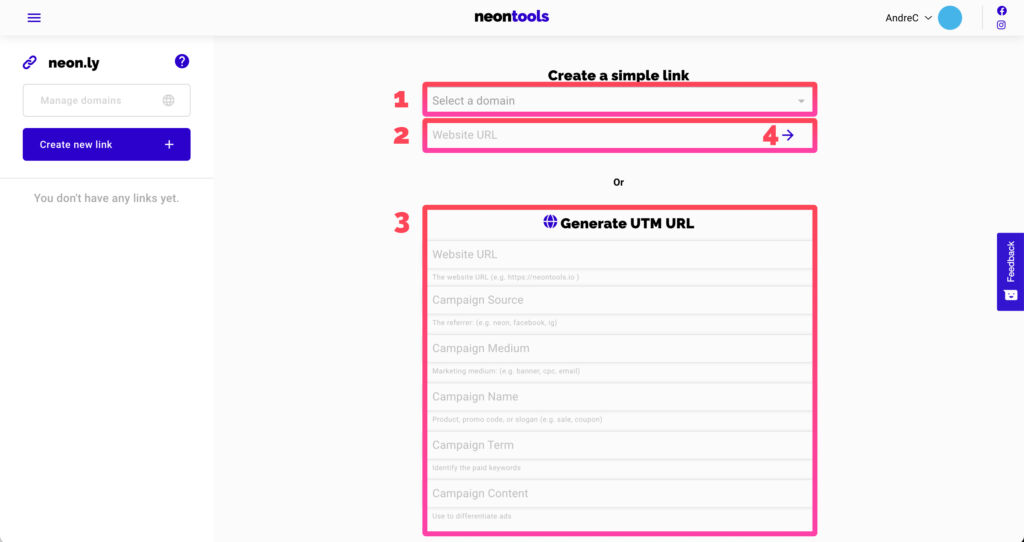
1. If you’ve added a custom domain, you can select it here (1). If no custom domains were added, you can ignore this field – neon.ly will be the default. To learn how to add custom domains, check out this tutorial.
2. Copy-paste the URL (the link) that you want to shorten into the field (2). We’ll call this your “base URL”.
3. Use the form (3) to add UTM tags to your URL (What are UTM tags?)
4. Then click the arrow (4) to confirm.
Modifying your short link
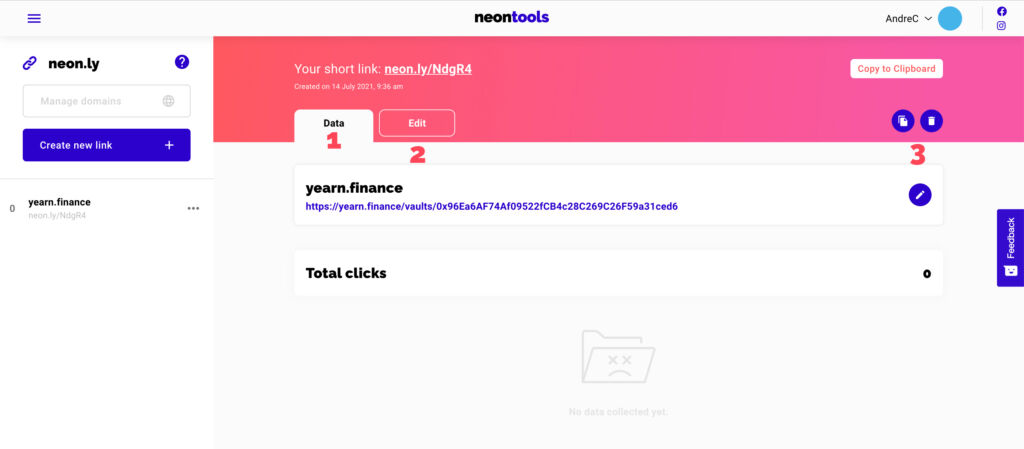
Congrats, you shortened your base URL and turned it into a neon.ly! The next screen is specific to the neon.ly you just created.
1. You’ll land on the data tab (1) which displays your click data (more about this later).
2. To modify your link click on the edit tab (2).
3. You can always duplicate or delete your links with these buttons (3).
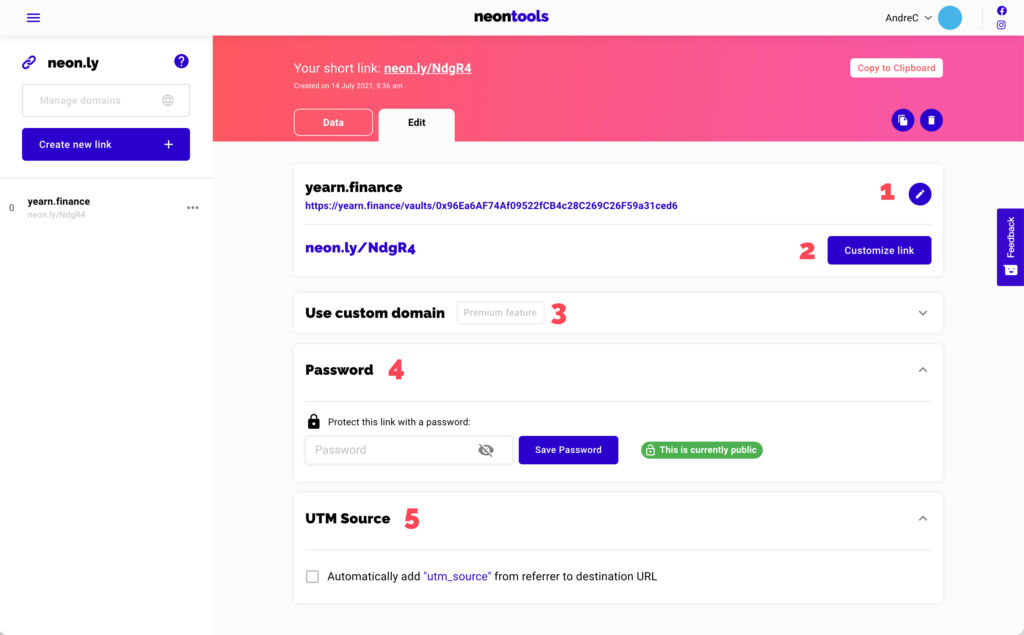
Let’s assume you clicked on the edit tab:
1. Modify your base URL here (1).
2. With the “Customize link” button (2), you are able to change the slug (what comes after the slash in “neon.ly/” or your custom domain).
3. You can always change your mind and use a custom domain for the link (3). To learn how to add custom domains, check out this tutorial.
4. You can protect your link with a password here (4).
5. If checked (5), our tool will automatically add the referral UTM source. So, if someone clicks on your link on Facebook, we will automatically add “?utm_source=www.facebook.com” to the base URL, so you see the information in Google Analytics.
Analyzing click data
Once you’ve shared your link and people click on it, data will start to appear below the edit options in this page. Remember to refresh the page to update the data, as it doesn’t update in real-time.
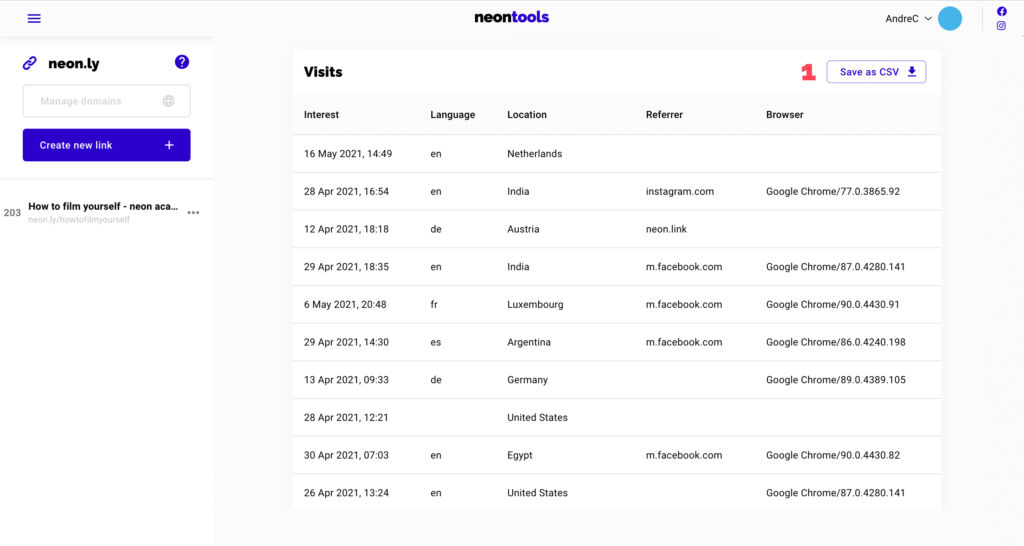
For each click, you will see:
- Referrer: The websites or apps where people clicked on your link
- Browser: The Web Browser people used when clicking on your link
- Platform: Did they use mobile or desktop?
- Location: The geographic location where your users come from
- Browser Language: The language of their web browser
Once you’ve collected a few clicks, your interface will look similar to this:

Furthermore, if you scroll down until the end, there’s a list of all the clicks that can be downloaded as CSV (1).