When should you use neon.page?
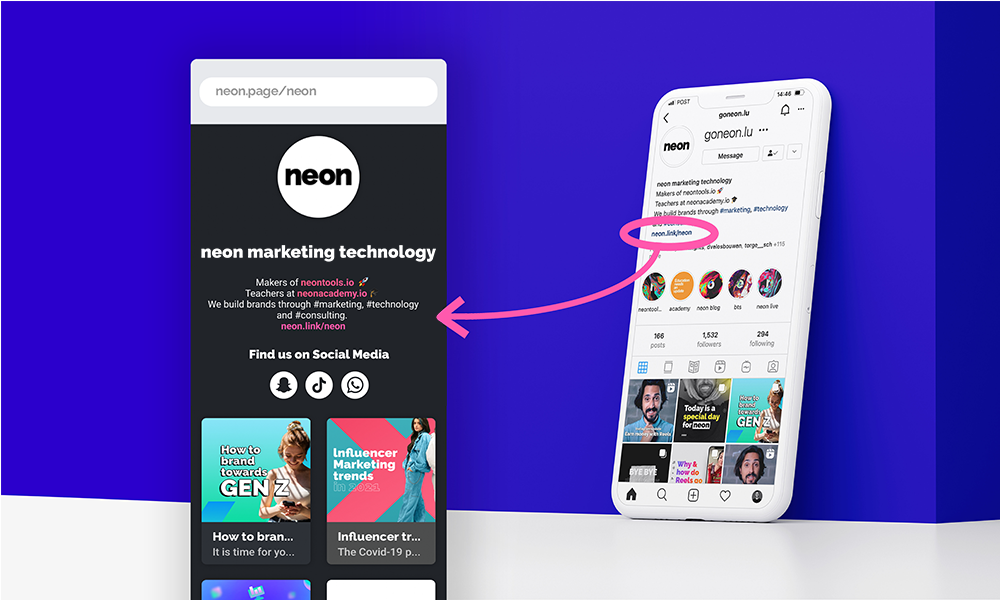
You know the deal: you want your audience to always find all your content, but you can add only one link to your IG or Twitter bio. So we build neon.page – our simple website builder is perfect for you if:
- ⏱️ you don’t want to waste time using complex website builders like wix or squarespace
- ☝️ you need to create a “link in bio” page for your Instagram bio or other places (online business card maybe?)
- 🔗 you want to share a collection of links that looks good, is always available and can be updated on the go
As an example, here’s our neon.page we use in our Instagram bio: neon.page/neon
How to use neon.page
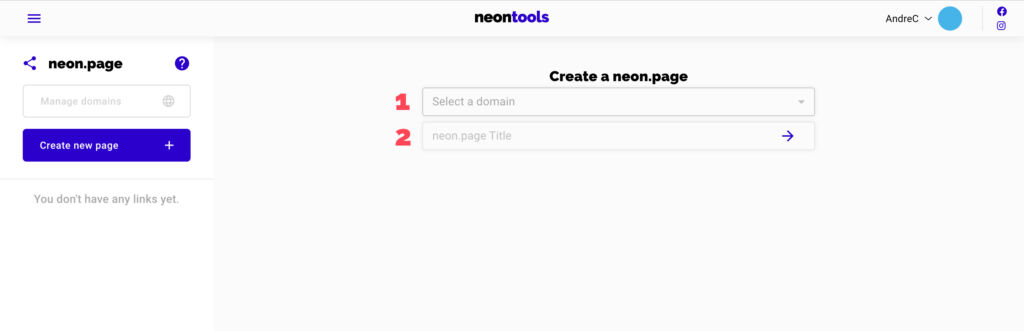
Creating a new page
1. If you’ve added a custom domain, you can select it here (1). If no custom domains were added, you can ignore this field – neon.page will be the default. To learn how to add custom domains, check out this tutorial.
2. Give your page a title (2) and hit the arrow to continue.
1. You’ll land on the data tab (1) which displays your click data (more about this later).
2. To modify your page click on the edit tab (2).
3. You can always duplicate or delete your page with these buttons (3).
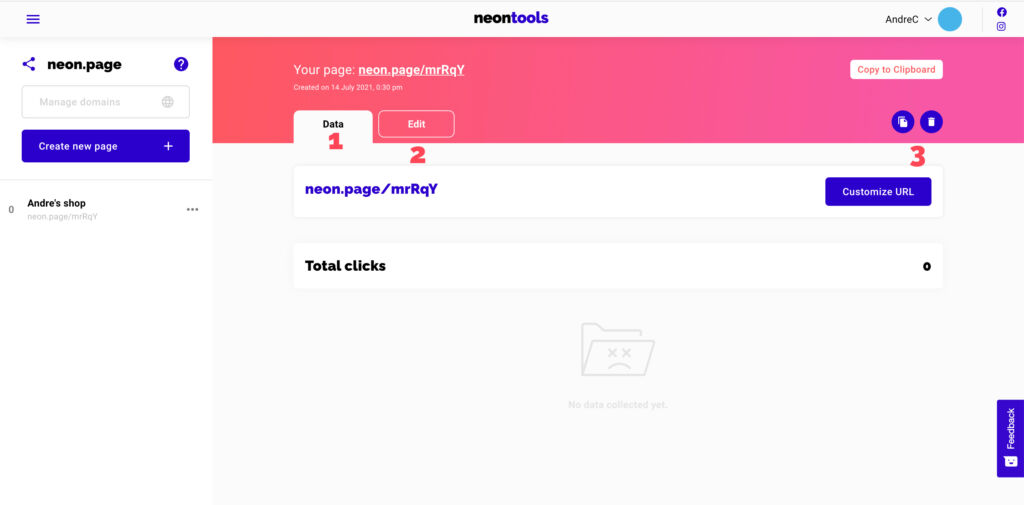
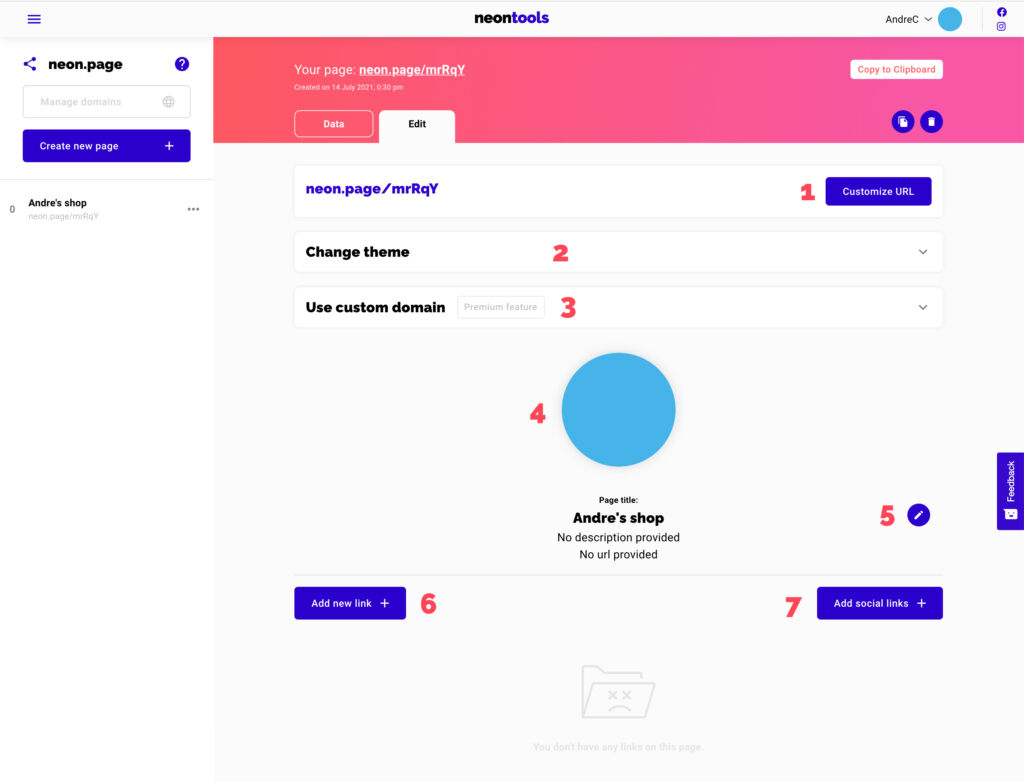
Let’s assume you clicked on the edit tab:
1. With the “Customize link” button (1), you are able to change the slug (what comes after the slash in “neon.page/” or your custom domain).
2. Choose a theme (2) that fits your style (if you have ideas for additional themes, lets us know on Twitter @goneonlu)
3. You can always change your mind and use a custom domain for the link (2). To learn how to add custom domains, check out this tutorial.
4. Add a title image to your page (3).
5. Click this button (4) to modify the title of your page, to add a description, and/or a URL below the title.
6. You can also add multiple social links on in the top of your page with this button (5). Simply choose the fitting icon and add a URL.
7. To add new links to your page, click this button (6).
Adding new links to a page
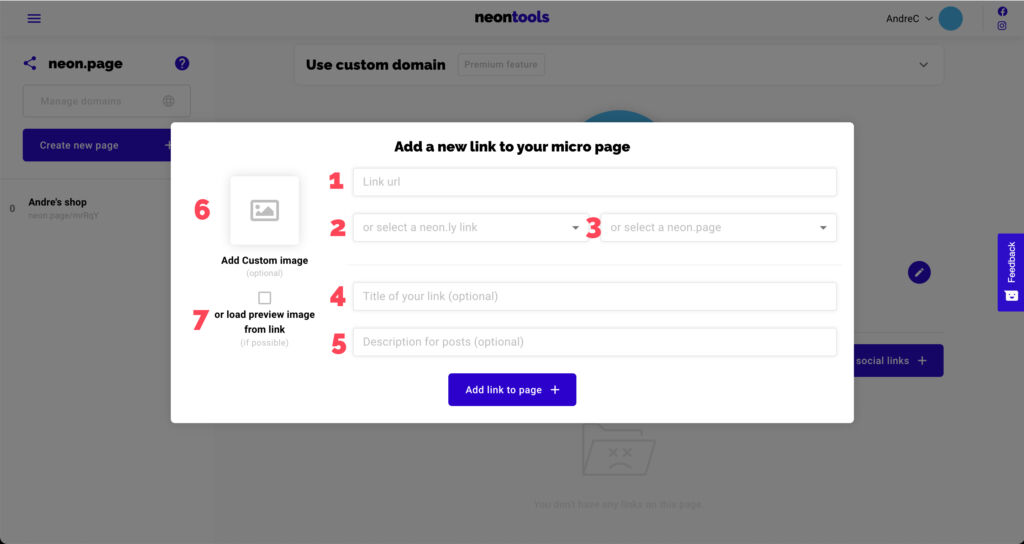
1. First you obviously need to add a link. This can be done in three ways:
- Paste any URL into field number (1),
- or use a trackable neon.ly that you’ve created beforehand (2),
- or use another neon.page that you’ve created beforehand (3),
2. As you see on the screenshot of neon.page/neon above, links are displayed in cards, and each card contains a title (4) and short description (5).
3. There’s to ways to add an image to a card:
- Upload an image (3),
- or choose to simply use the image the link provides (4). When uploading an image, keep in mind that it ideally should be in a 1:1 format.
4. Images are optional. If a link does not have an image, the card will be displayed differently. Try it out 😉
Modify your links
Once you added some links, you might want to modify them.
1. To change the order of the links, simply drag&drop them (1).
2. You can still edit the title, description, image, and link of each card (2).
3. Duplicate or delete each link (3).
4. Highlight a link (4). A highlighted link will be displayed in bigger card than normal ones. Give it a try 🙂

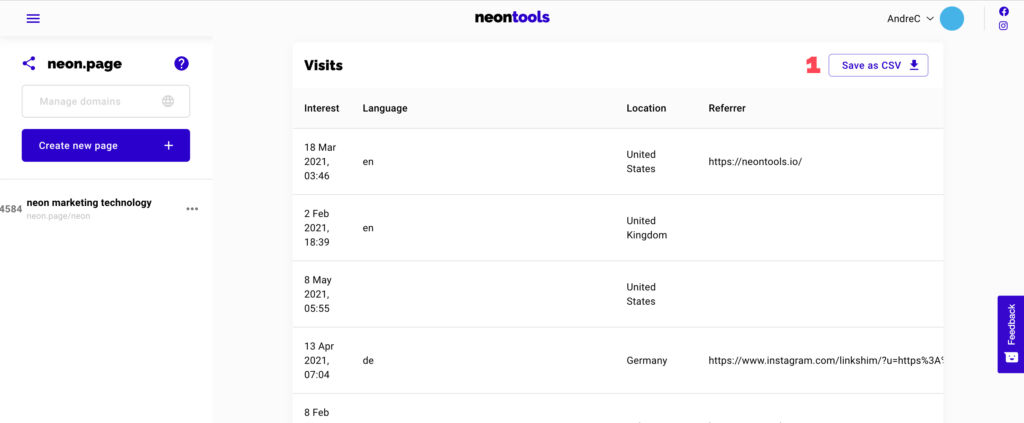
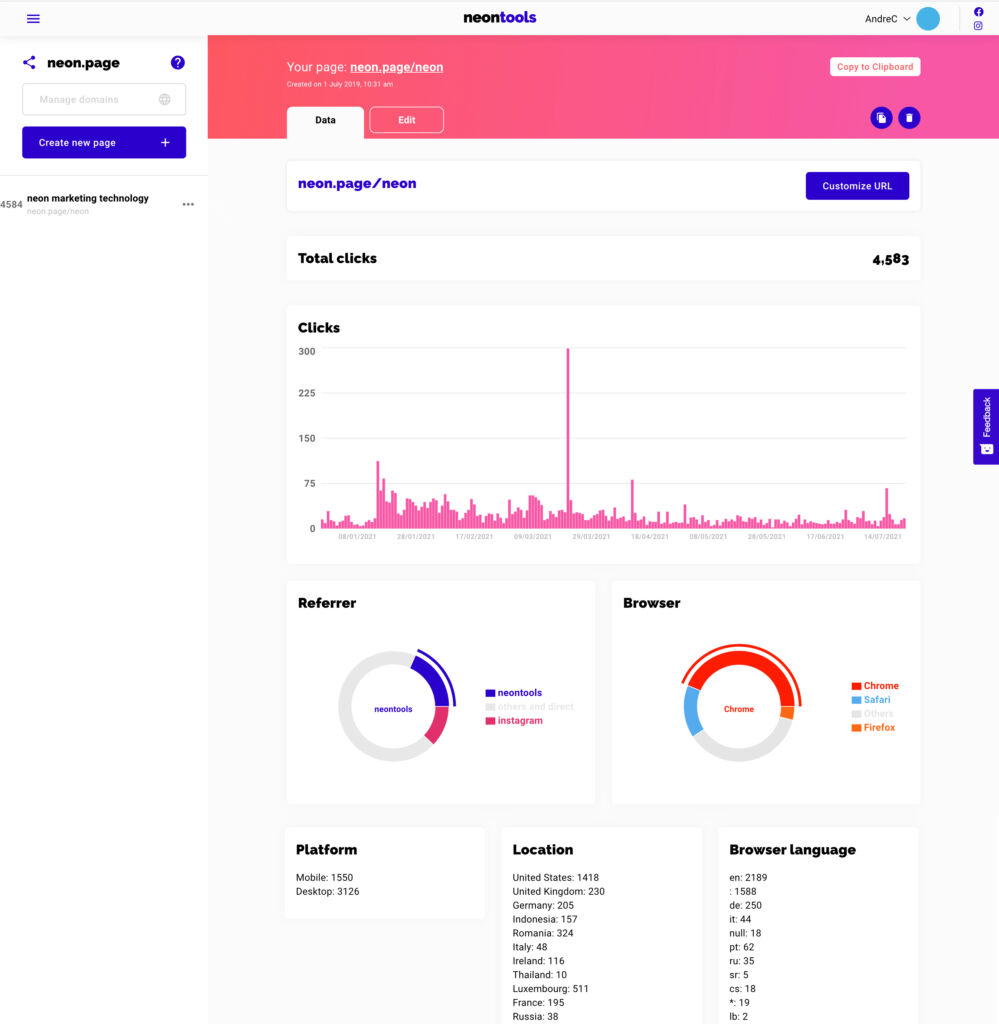
Analyzing visitor data
Once you’ve shared your page and people visit, data will start to appear below the edit options in this page. Remember to refresh the page to update the data, as it doesn’t update in real-time.
For each visitor, you will see:
- Referrer: The websites or apps where people clicked on your link
- Browser: The Web Browser people used when visiting your page
- Platform: Did they use mobile or desktop?
- Location: The geographic location where your users come from
- Browser Language: The language of their web browser
Once you’ve collected a few clicks, your interface will look similar to this:
Furthermore, if you scroll down until the end, there’s a list of all the visitors that can be downloaded as CSV (1).